

How To Create Depth In A Drawing
15 Proven Ways to Draw the Illusion of Depth in Art
Updated: 18 Sep 2021
When drawing in a realistic style, it is helpful to draw from direct observation, or by using reference images.
However, for an initial sketch or when drawing from imagination, there are several proven methods to create the illusion of depth.
1. Volume
Unlike flat objects, 3D objects appear to have volume and therefore indicate depth.
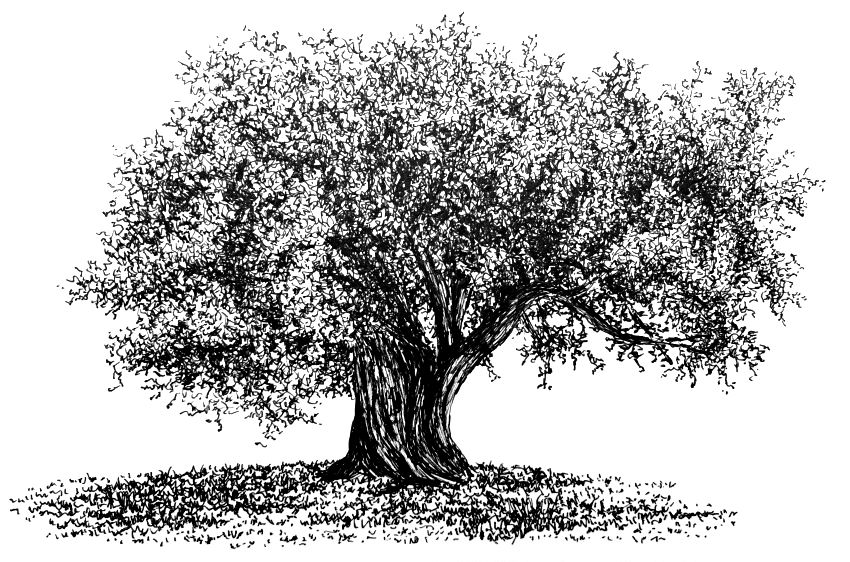
A three-dimensional object will have highlight and shadow areas depending on where the light source is located.
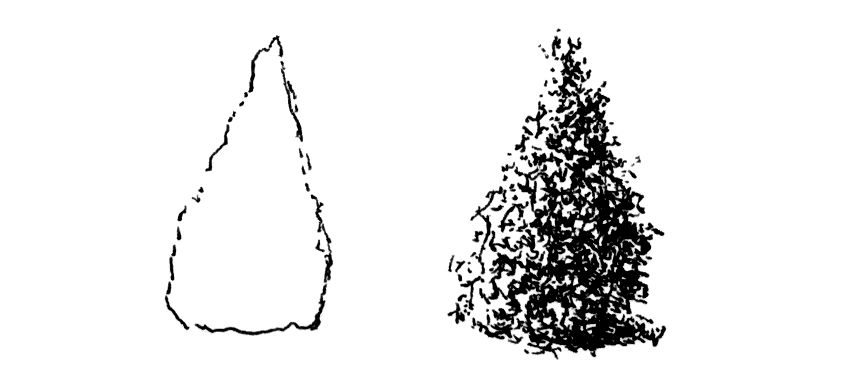 Flat vs 3D object with volume
Example:
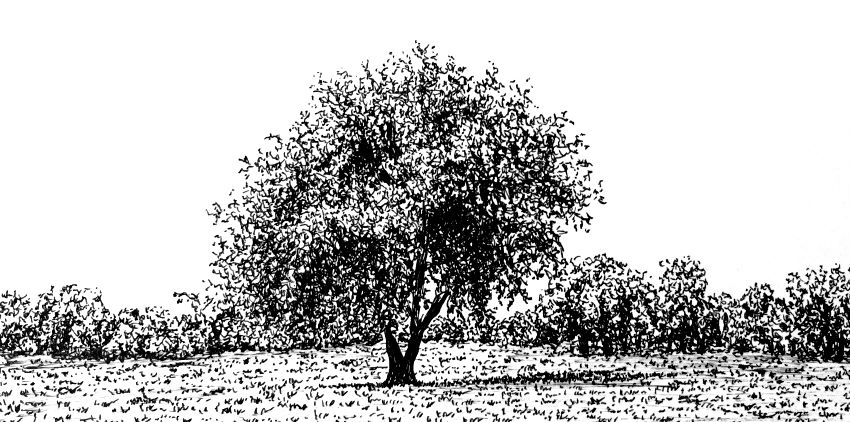
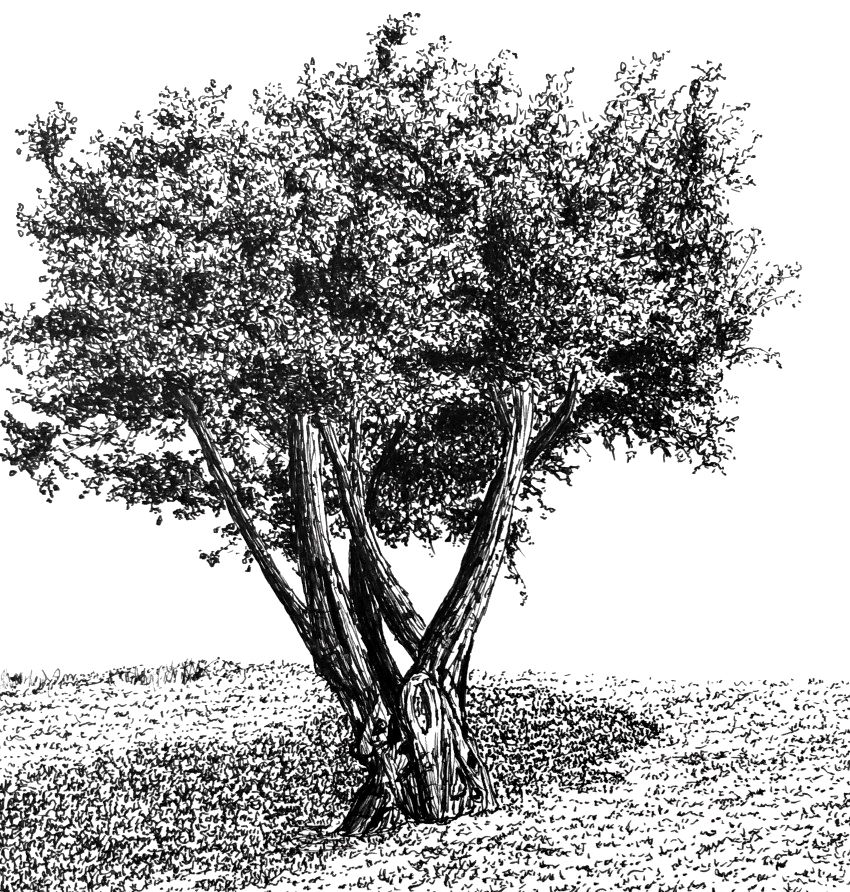 Pen and ink olive tree
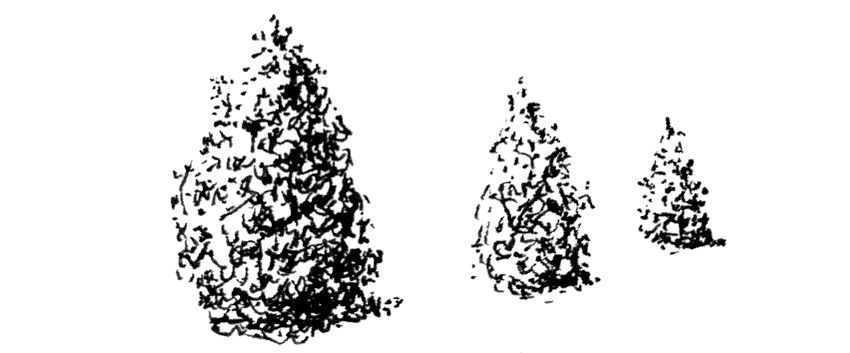
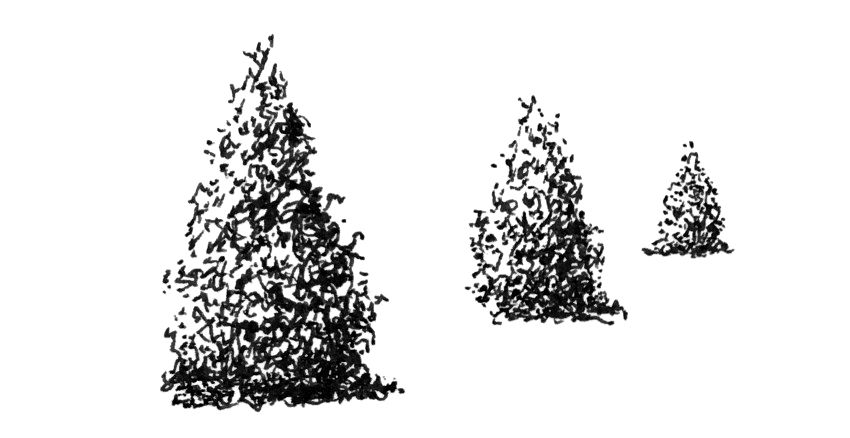
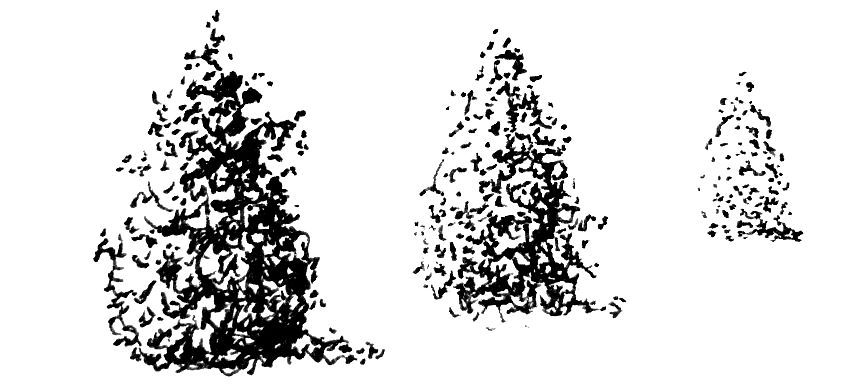
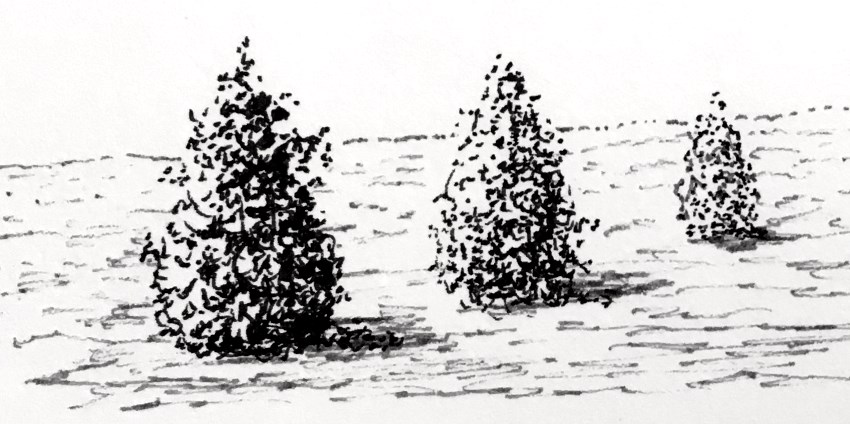
2. Size
According to the rules of perspective, the farther an object is, the smaller it will look.
For that reason, when drawing similar objects in different sizes, one can conclude that smaller objects are farther away, thus create a sense of depth.
 Objects with different size
Example:
 Pen and ink olive trees
Size can also be used to create a sense of space.
Adding small objects to a defined space will make it look big:
 Small object defines big space
Adding big objects to the same space will make it look small:
 Big object defines small space
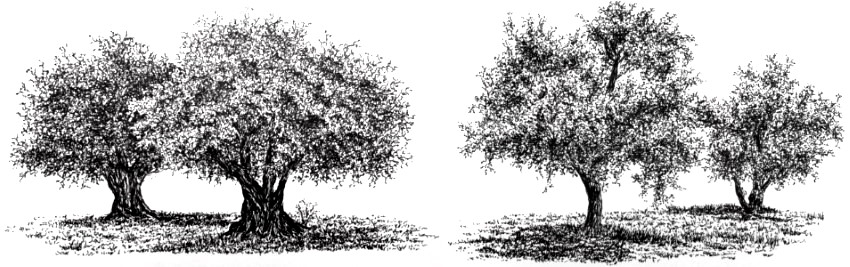
3. Overlap
A body concealing part of another body indicates that the body it is hiding is farther away.
 Overlapping objects
Example:
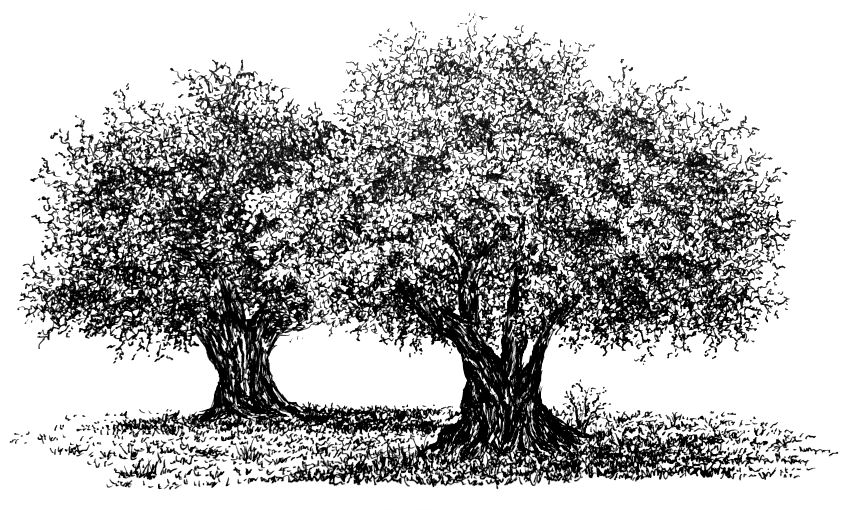 Overlapping olive trees
If you like my tree drawings, feel free to visit my guide on how to draw ANY tree with a pen.
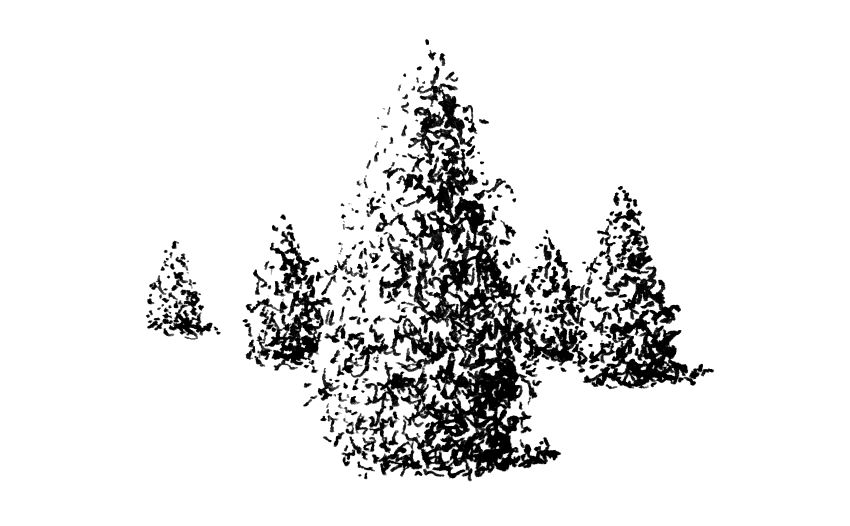
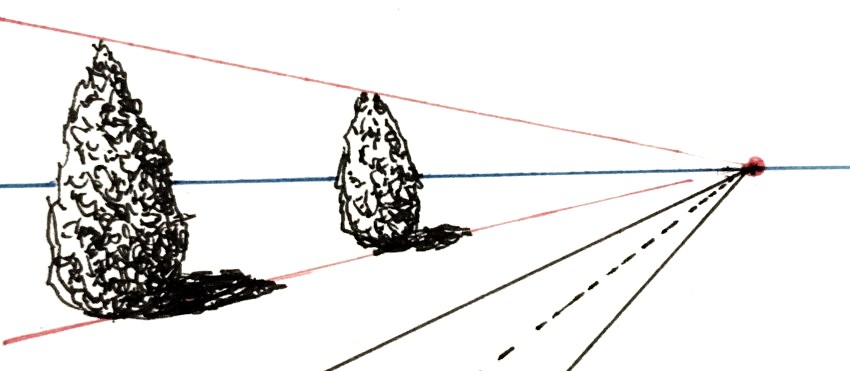
4. Position/Height
Objects that their base is positioned higher on the drawing surface will look farther away.
 Different positioning
In most cases, the base of closer objects will be lower on the drawing surface AND the top part of close objects will be higher than far objects.
Note:
This happens when the horizon is placed in the middle (more on that later).
 Closer object position & height
The reason is the observer's visual angle, meaning not measuring in meters but in degrees, in perspective.
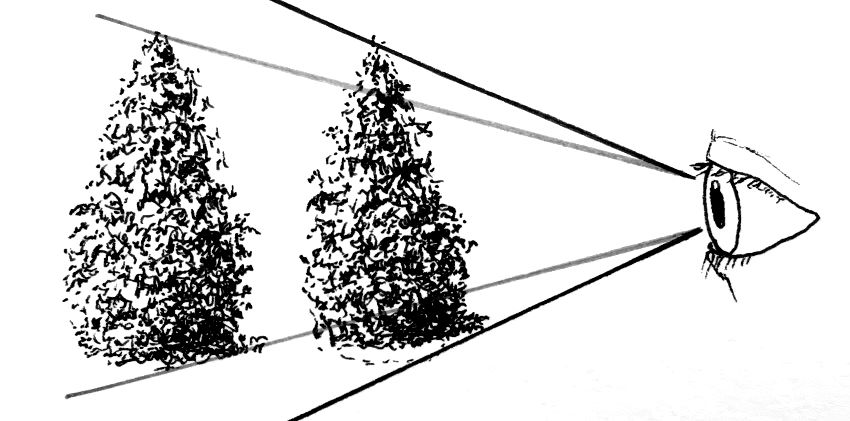 Observer angle of sight
Example:
 Tree position
When looking from above, the top part of closer objects will be lower on the drawing surface.
 View from above
For recommended drawing pens, visit my technical pens review for artists.
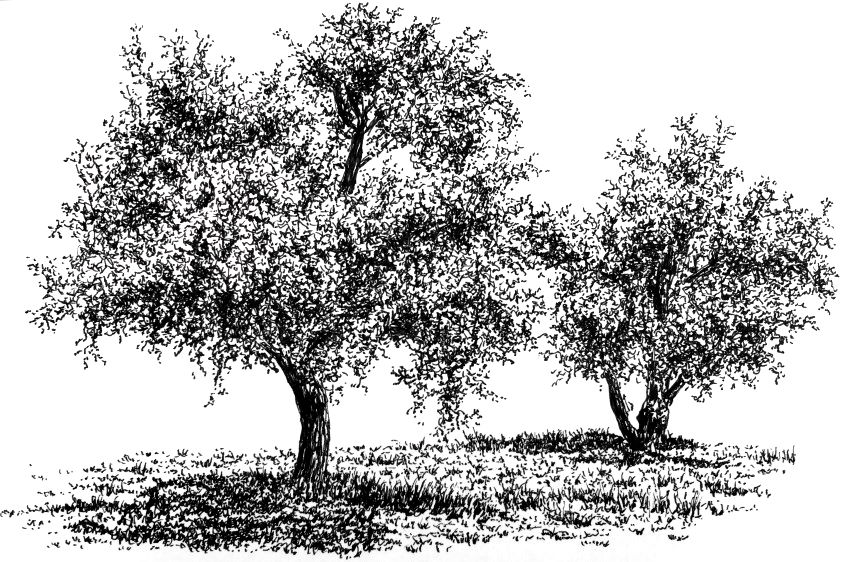
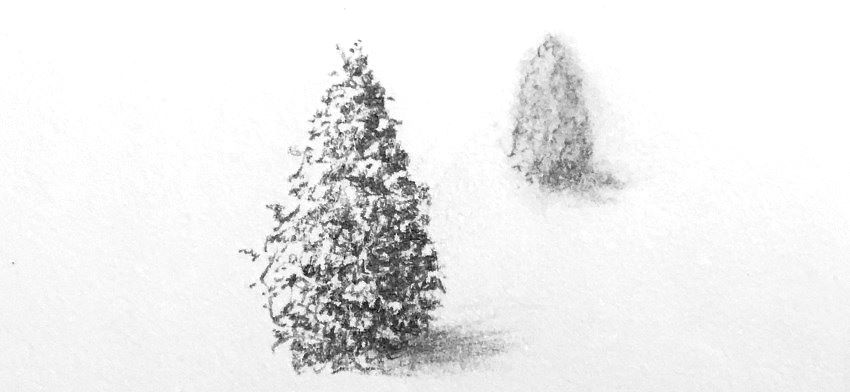
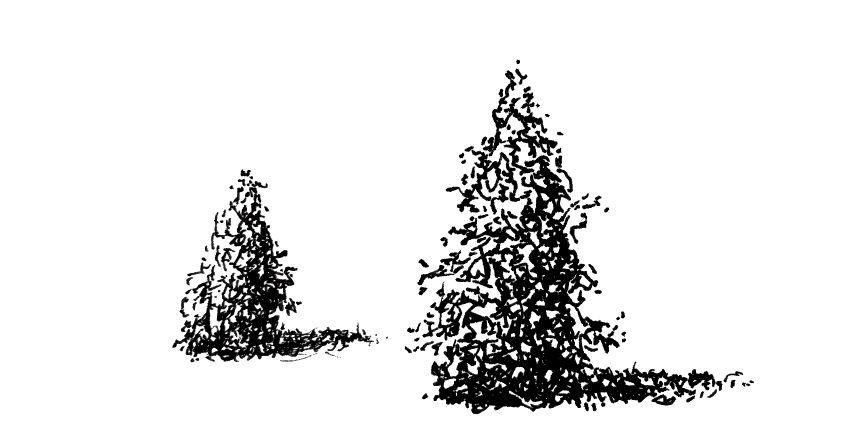
5. Contrast & Details
The contrast between the dark and light areas decreases, as does the amount of details, as an object is farther away.
 Decreasing levels of contrast & details
That is to say, when drawing or painting, areas with high contrast will come forward and areas with less contrast will recede.
Example:
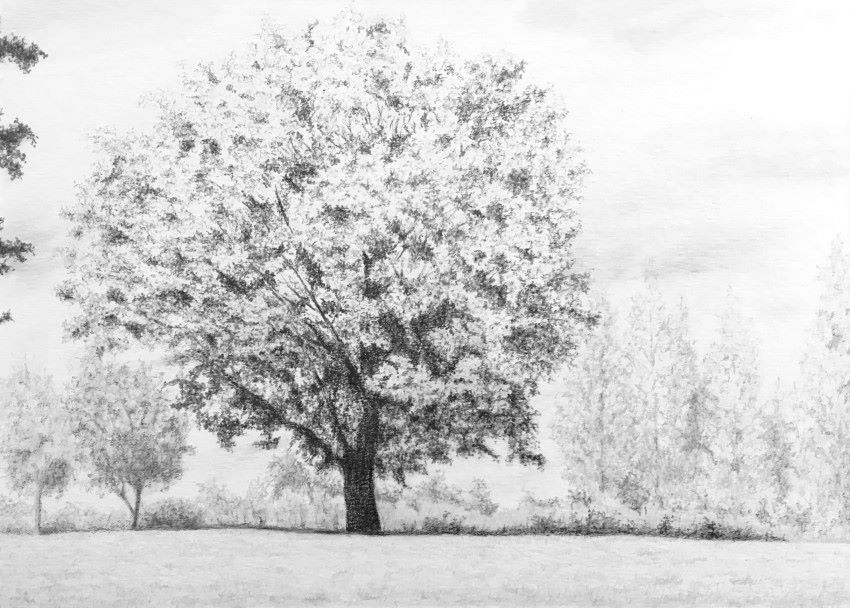 Trees pencil drawing
6. Edges
When an object or surface ends in a sharp way, it means it has a hard edge.
Soft edges are when objects end in a gradual way, from dark to light.
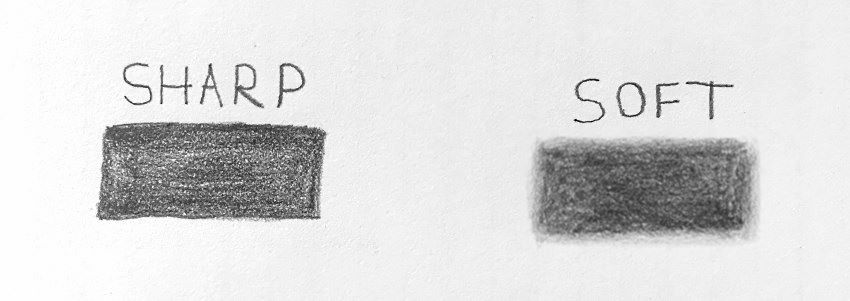 Hard/sharp vs soft edges
Foreground objects will have hard edges and therefore in focus.
Background objects will have soft edges and therefore blurry.
 Background objects have soft edges
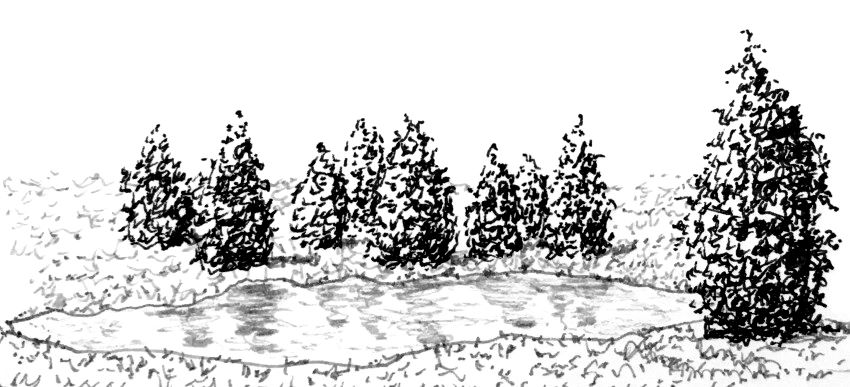
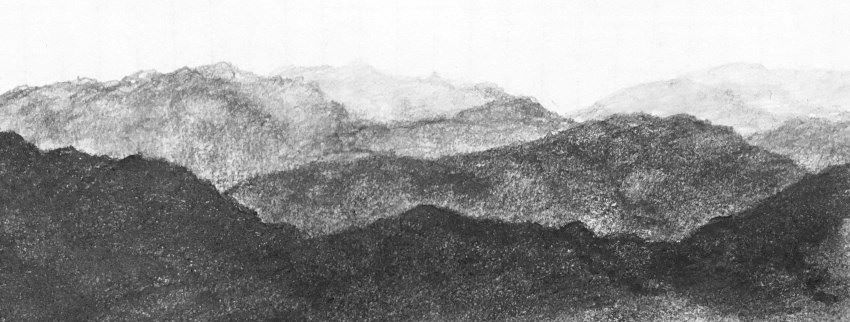
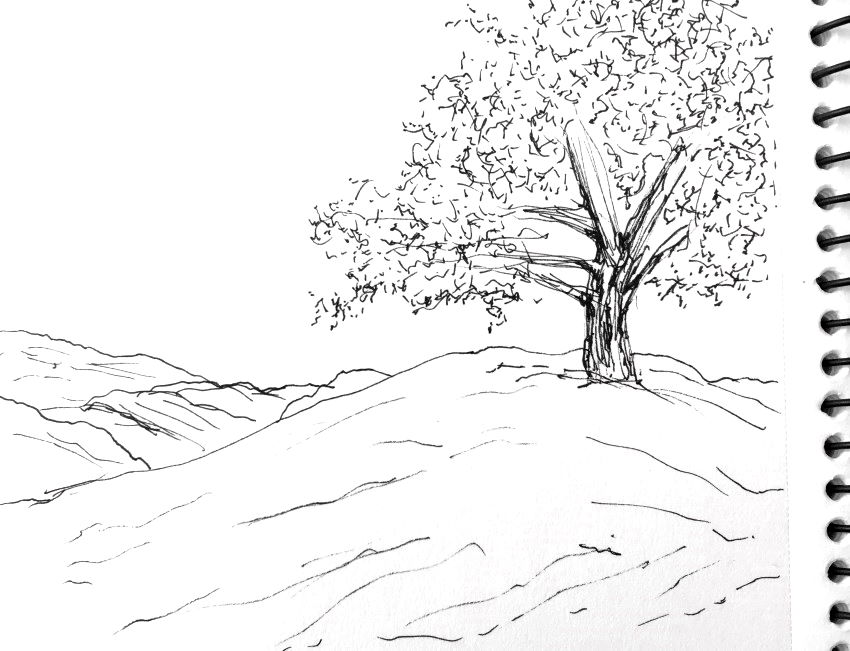
7. Horizon
Dividing your drawing into ground and sky by a horizon line, mountain range, vegetation or any other way, attests to depth.
In addition, by adding ground, the objects stop "hovering".
 Horizon and ground
Pencil drawing example:
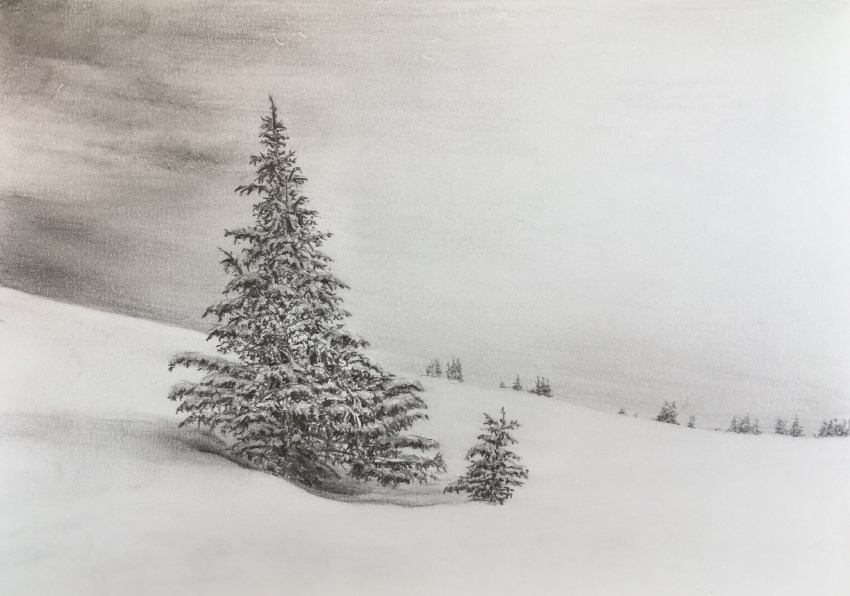 Snowy horizon & pine tree
Remember:
Your drawing surface is flat! You have no depth, only width and height.
As objects are closer to the horizon, they appear farther away.
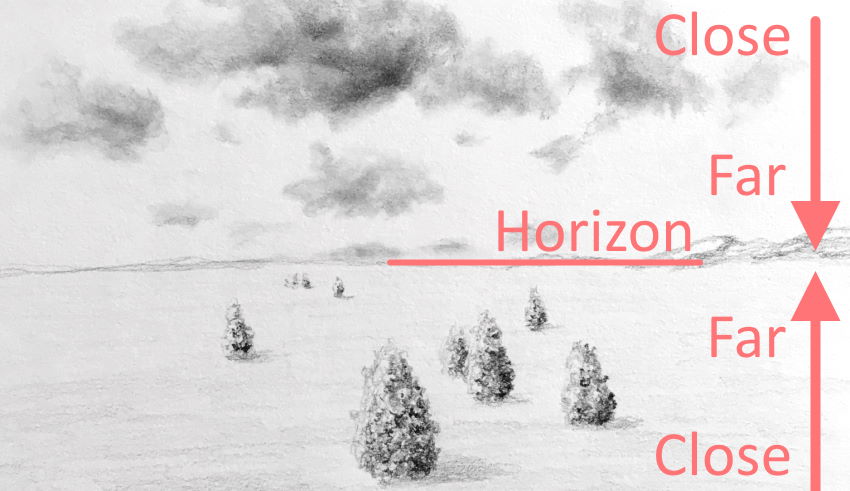 Height as a measure of distance
In the image above, trees that are higher on the drawing surface (toward the horizon) will look farther away.
Clouds that are lower on the drawing surface (toward the horizon) will look farther away.
For a list of equipment that I use for drawing, visit my guide for pencil drawing supplies.
8. Perspective
By using linear perspective, it is possible to demonstrate depth in a realistic manner.
 Linear perspective
Example:
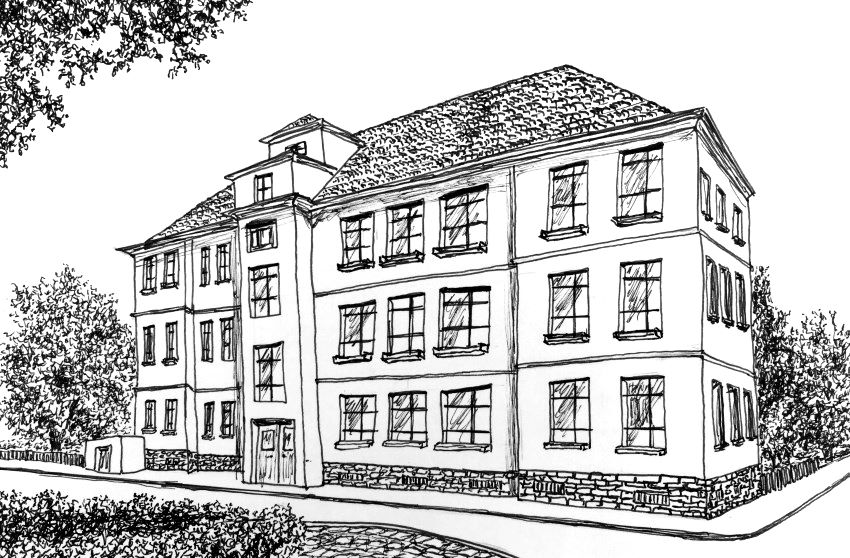 House sketch in perspective
9. Foreshortening
Objects in front of the viewer, such as buildings, trees, mountains, people, etc., will look smaller as they are farther away, but will maintain the ratio between height and width. This means that there will be no distortion.
On the other hand, when we change the object (or our) angle of sight, and the object is now along the line of sight, it will get shorter in that direction.
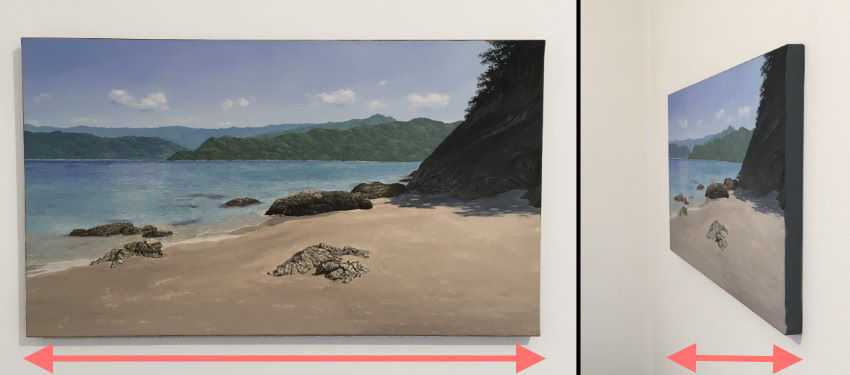 Foreshortened oil painting
This distortion is due to the angle of sight. The more an object is in our direction of sight, the more it will be distorted (becomes much shorter in that direction).
For example, a lake that in reality can be round, in perspective becomes more elliptical as the distance between it and the observer grows.
 Foreshortened lake
Note:
Cast shadows will be subject to foreshortening (unless they are in front of us).
 Cast shadow foreshortening
Understanding foreshortening is THE key advantage of experienced artists, especially when drawing from imagination.
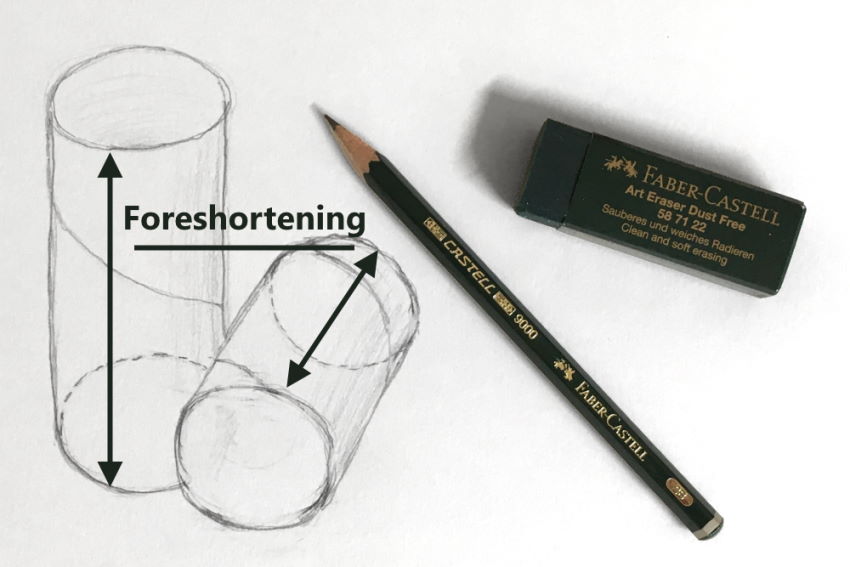 Foreshortened cylinders
Once your sketch is correct, it is ready for rendering.
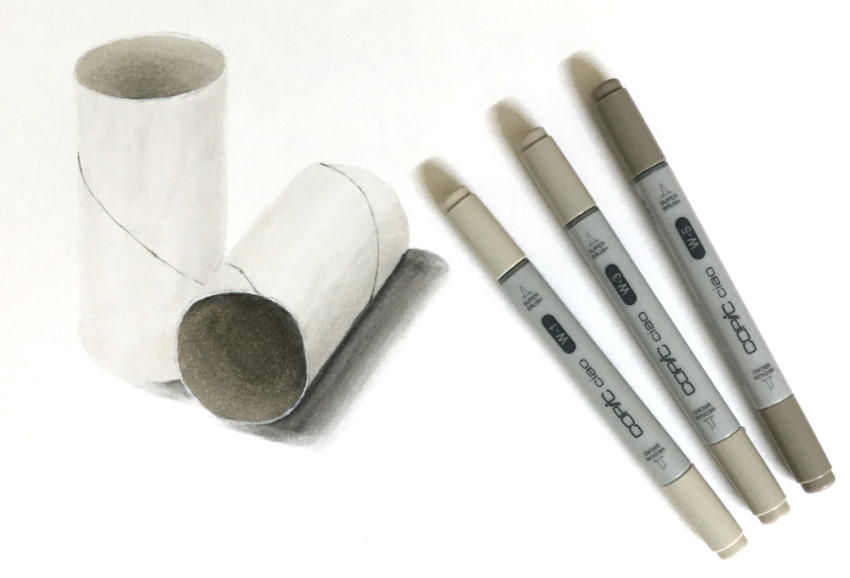 Coloring with markers
If you are new to foreshortening, feel free to visit my guide on drawing from imagination (It is an advanced guide, but explained step-by-step).
10. Colors
According to the rules of atmospheric perspective, the farther an object is, the more its color (hue) shifts toward the background color, which is usually blue sky.
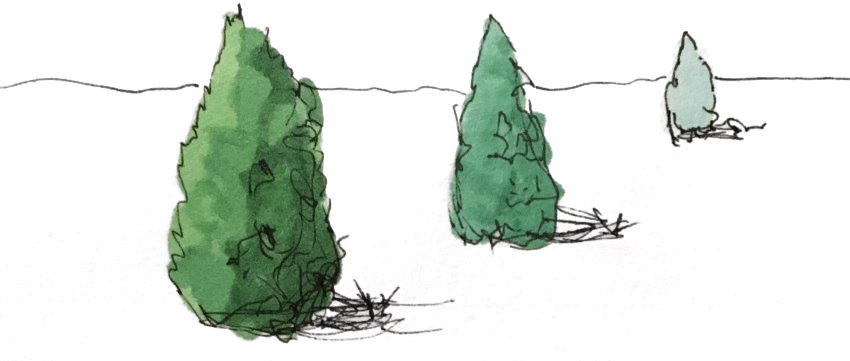 Green slightly shifts to blue
11. Saturation
The farther an object is, the less saturated its color will be.
In other words, its color will be less rich, bright or intense, therefore becoming dull or neutral.
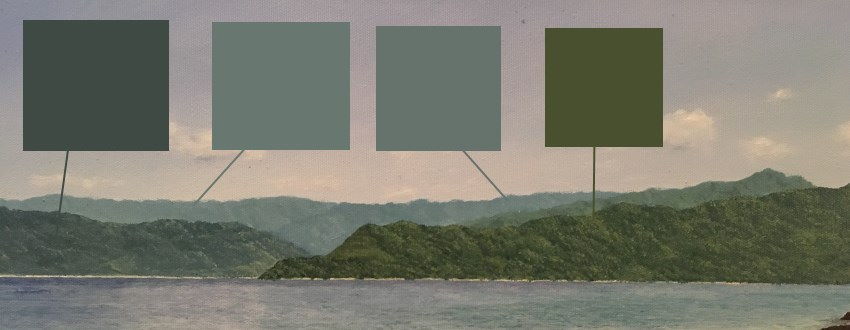 Far objects are dull or grayish
Example:
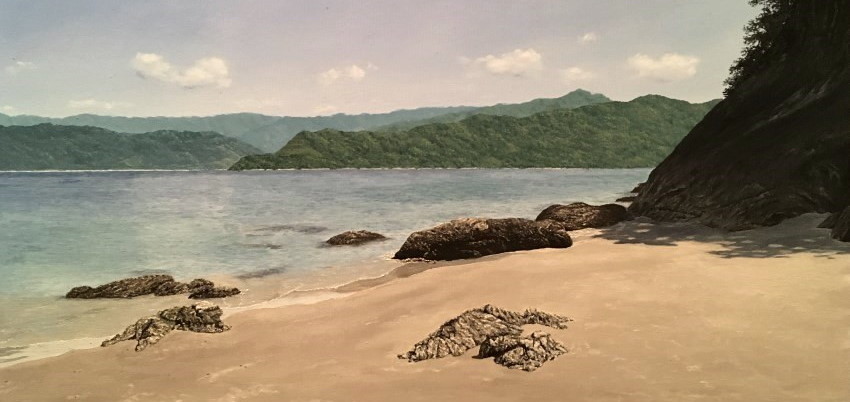 Seashore oil painting
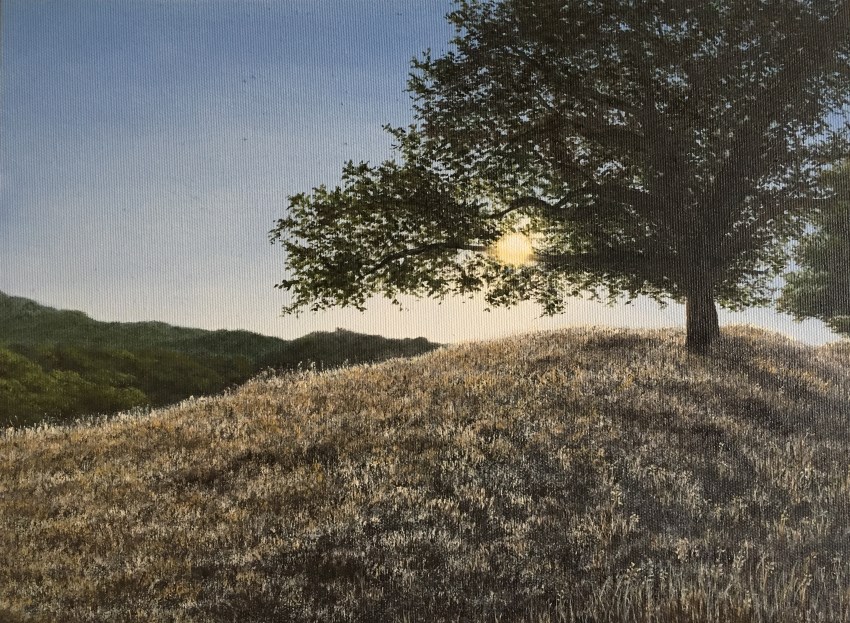
12. Temperature
Purple, blue and green are cool colors; they bring to mind the ocean.
Red, orange and yellow are warm colors; they bring to mind fire.
The farther away an object is, the more atmosphere particles will be between it and the observer, i.e. the atmosphere color will have a bigger effect.
When the sky is blue, the color of background objects will shift gradually toward a blue hue due to scattered light, and therefore becomes cooler.
Foreground objects will be warmer than the background objects since there are less atmosphere particles between the observer and the foreground objects.
Opposite phenomenon may occur in sunrise or sunset.
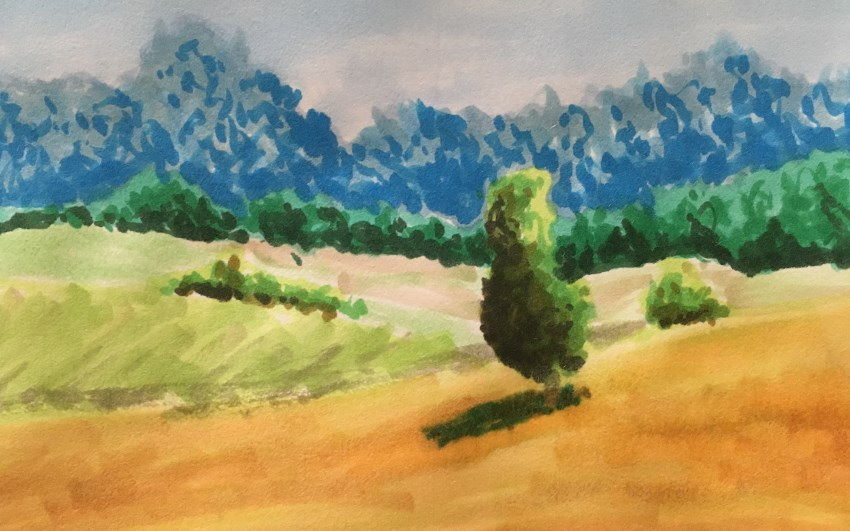 Temperature in landscape
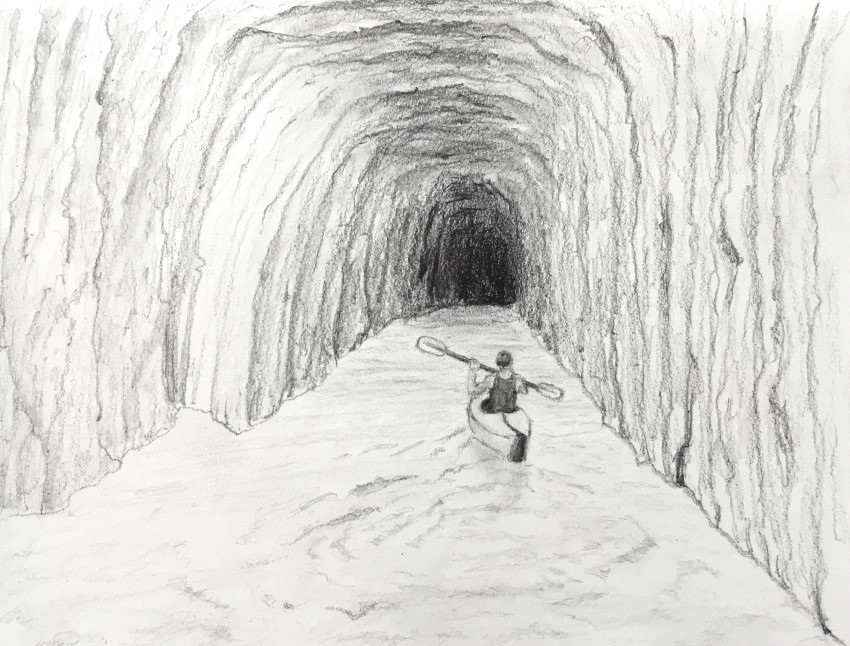
13. Values
According to atmospheric perspective, farther objects will have higher brightness values, meaning their color will be lighter.
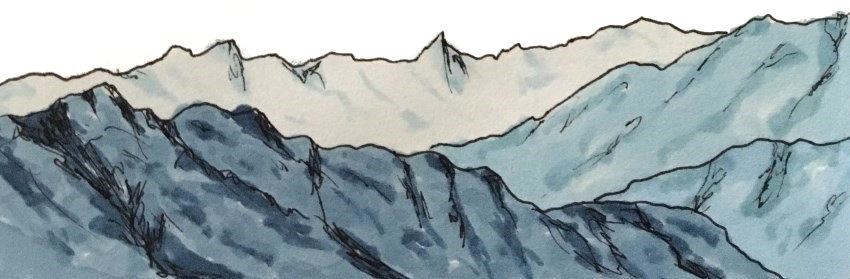 Farther object is lighter
For monochromatic drawing, like pencil drawing, the same principle applies.
The key is to press harder with a drawing pencil for darker values or to use pencils with different brightness values.
 Foreground objects are darker
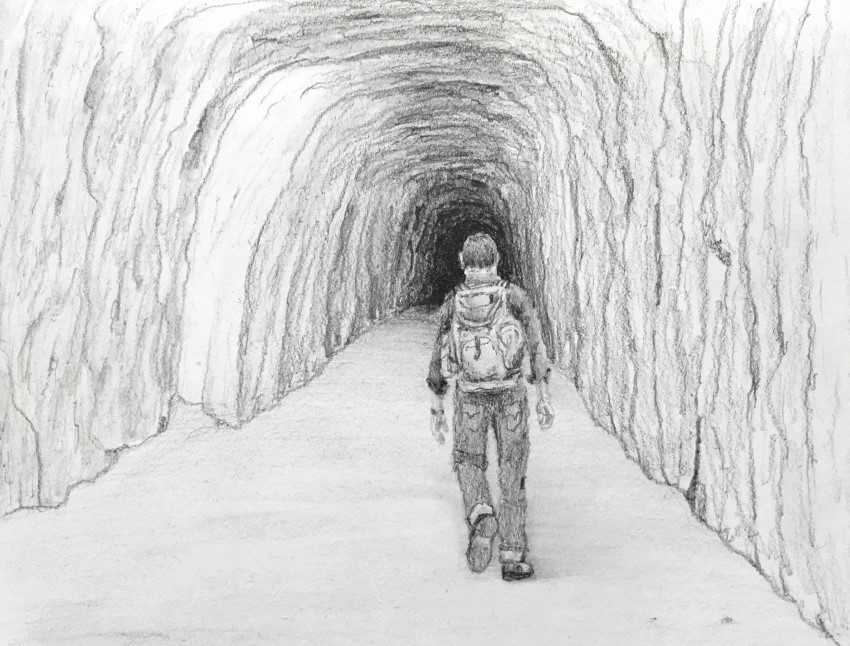
In addition, transitions (gradient) in brightness values can be used to create the illusion to depth.
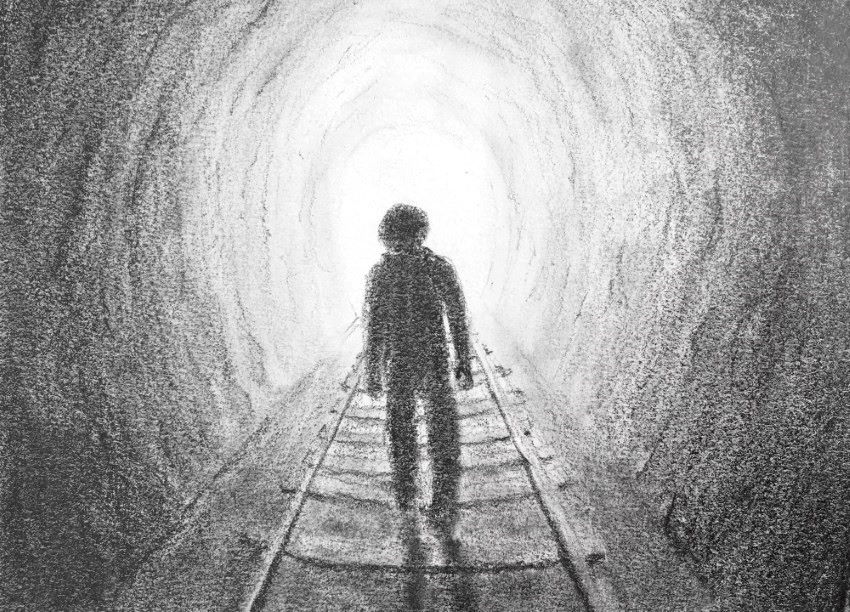 Transition from dark to light
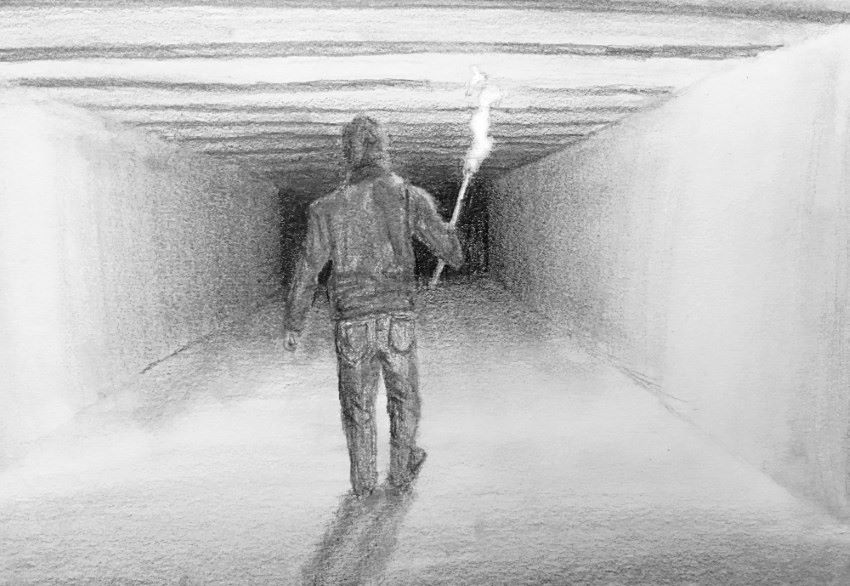 Transition from light to dark
14. Cast Shadow
It is important to paint or draw cast shadows when necessary and adjust their direction to the opposite side of the light source.
 Cast shadow
Example:
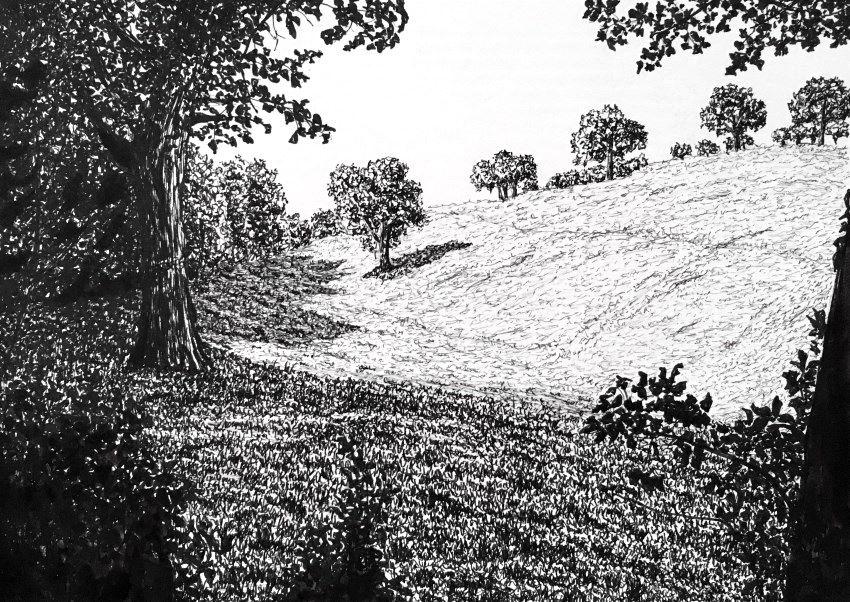 Landscape with pen & ink
In order to learn how to compose a scene and render it, read my tutorial on composition drawing.
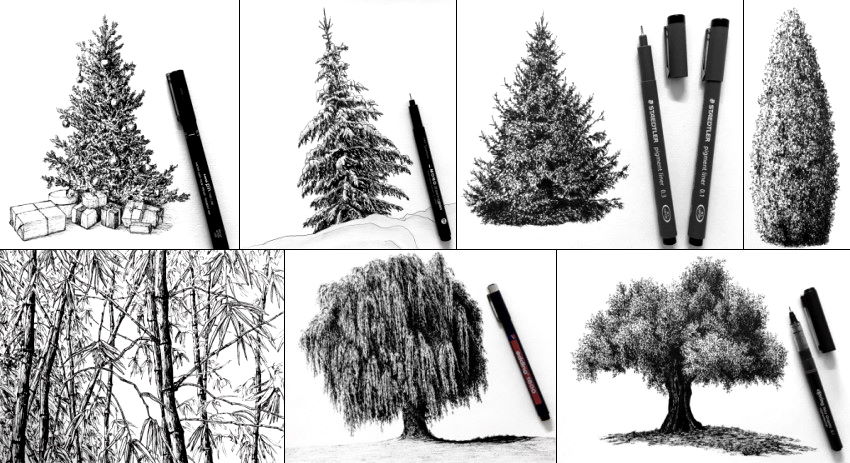
15. Brushstrokes & Marks
Some painting styles are done with a collection of single brushstrokes. For example, painting grass blades or leaves.
In these cases, larger paintbrushes can be used for foreground strokes.
You can do the same with a technical pen.
Use a pen with a bigger nib size for bigger marks when drawing foreground objects, and a smaller nib size for background objects.
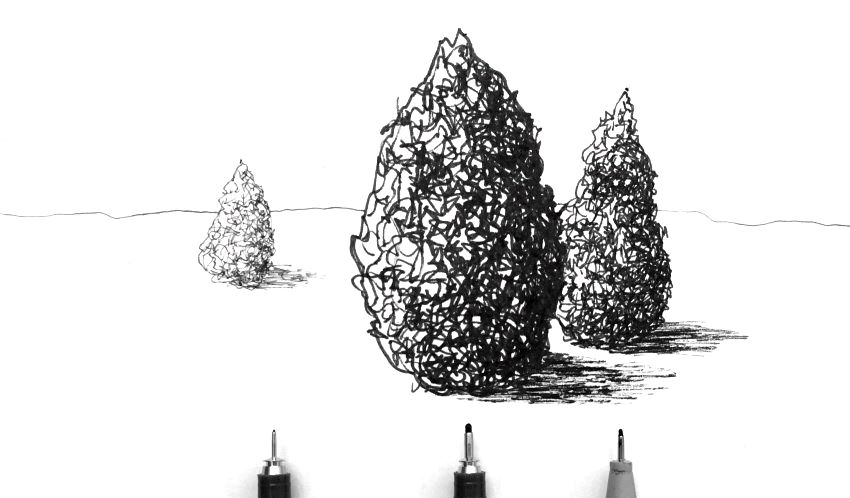 Different nib sizes
Example:
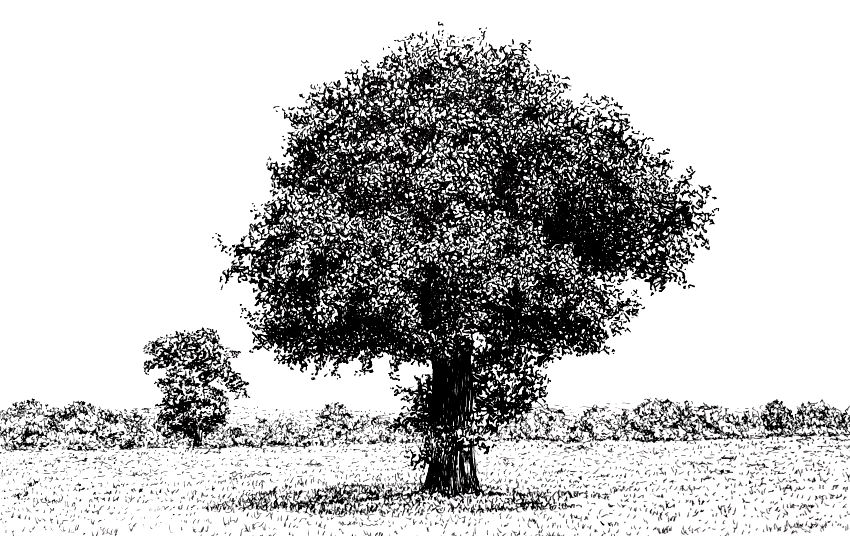 Pen drawing of a tree
For an initial sketch, the direction of lines/marks or brushstrokes is important.
Same basic shape with different marks direction tells a different story:
 Marks direction for creating shapes and depth
When planning a painting, marks direction play a major role:
 Marks as first step
And they are necessary when painting.
Example:
 Tree in sunset oil painting
If you are new to oil painting, it is good to know the different types of paintbrushes for oil painting.
Summary
The key to create depth when drawing is the use of different methods to produce a three-dimensional look on a two-dimensional surface.
Simply put, there is no actual depth in drawing (or painting), but an illusion of depth.
Colors:
When using colors, it is important to pay attention to color attributes such as hue, saturation, value and temperature.
In a monochromatic drawing, correct brightness values are crucial.
Landscape vs still life:
For landscape painting, it is important to understand linear and atmospheric perspective.
When painting a still life, use methods like contrast, overlap, and soft edges to create depth.
Where to go next?
After understanding depth, you might want to visit my beginners guide to realistic pencil drawing.
And, learn about the 8 key factors for painting realism.
If you like drawing with pens, here is my flower drawing guide.
![]()
![]()
Copyright © RanArtBlog.com. All Rights Reserved. | Sitemap
How To Create Depth In A Drawing
Source: https://ranartblog.com/blogarticle20.html
Posted by: pepperhisday.blogspot.com
0 Response to "How To Create Depth In A Drawing"
Post a Comment